Teuku.Net - Microsoft has just embedded a generative AI (Artificial Intelligence) based feature called Copilot in Windows 11 update September 2023 version 23H2 and later. With this feature, users can perform various tasks with the help of AI.
It can assist with tasks such as finding files, setting reminders, and even writing emails. This system will help users to navigate Windows 11 more efficiently. In this article, we will guide you through the steps to enable and disable Windows Copilot in Windows 11.
But before we talk about how to enable and disable Windows Copilot in Windows 11, let us first take a look at how Windows Copilot works.
{getToc} $title={Table of Contents}
Here's How It Works:
- Windows Copilot is available as a separate app in Windows 11. It can be accessed from the taskbar across all apps and programs.
- It can be activated by clicking on the Copilot button, which is located next to the search bar on the taskbar.
- Windows Copilot uses natural language queries to provide custom answers to users’ questions, much like ChatGPT and Bing Chat.
- It can perform actions on a user’s behalf, such as changing a setting, starting a playlist, or opening an app.
- Windows Copilot can summarize content that users are viewing in apps, rewrite it, or even explain it.
- It can also provide ChatGPT – like answers to queries in the context of a chat.
- With Windows Copilot, users can ask it to rewrite, summarize, or explain content copied from one app and then paste a new version into another.
- Windows Copilot is built on the same base as Bing Chat, and Microsoft is allowing first- and third-party plugins to be integrated with it.
How To Enable COPILOT On Windows 11
- Enrol any Windows 11 PC on this channel by opening the Windows 11 Settings app – Windows Update.
- Windows Insider Program and sign in with a Microsoft Account.
- Click the Get Started button
- Link your Microsoft Account, and choose Dev Channel
- Press Continue and then follow the steps on your screen.
- Go back to Windows Update and click the Check for Updates button.
Steps To Get COPILOT On Windows 11 Running
- Download the latest release from the ViveTool GUI GitHub
- Launch the installer.
- Use the directions shown on your screen.
- After installing the app, launch it.
- On the left, you will see a “Select Build” section, choose 23493.1000.
- Allow the list to populate. It could take a few minutes.
- Press the Manually Change a Feature button.
- Look for 44774629. Click the Perform Action button and select Activate Feature. Make sure you click on Close after selecting Activate Feature.
- Look for 44850061. Click the Perform Action button, and select Activate Feature. Press Close.
- Look for 44776738. Click the Perform Action button, and select Activate Feature. Press Close.
- Look for 42105254. Click the Perform Action button, and select Activate Feature. Press Close.
- Look for 41655236. Click the Perform Action button, and select Activate Feature. Press Close.
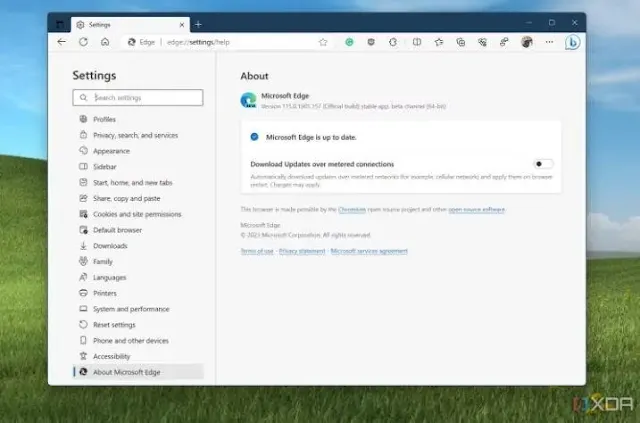
- Update the Microsoft Edge browser by clicking the three-dot button, going to Help and Feedback, and then About Microsoft Edge. The browser will download an update.
- Reboot your PC. You may need to do this multiple times, two or three times.
- Launch Windows Copilot with Windows Key + C
How to Disable COPILOT Feature in Windows 11.
However, what if you don't want to use this feature after installed? well, you can follow the easy steps below to know how to disable the Copilot feature in Windows 11.
Via Settings in Windows 11
- Open the 'Settings' app on your Windows 11 PC.
- Select the 'Personalization' section from the sidebar on the left.
- Scroll down a bit and select 'Taskbar'.
- To disable Copilot, turn off the toggle switch next to the Copilot option.
Via Registry Editor
This step is used for all versions of Windows 11, including Home. Different from the method above, this method somewhat requires knowledge of registery access in Microsoft's OS.
- Click the Windows+R keyboard key to bring up the Registry Editor, or type regedit in the Windows search box.
- In the Registry Editor, go to HKEY_CURRENT_USER\Software\Policies\Microsoft\Windows. After that, right-click on Windows ⇥ New, and select the DWORD option.
- Create a new folder called TurnOffWindowsCopilot, and change the value from 0 to 1 to disable Copilot or 0 to enable it again.
- Click OK to save the changes and restart your PC or laptop.
Once you have done any of the above, the Copilot feature will be disabled and its icon will disappear from the Windows 11 taskbar.
Keep in mind, how to disable Windows 11 Copilot through the registry editor is more complicated than the first method.
Hopefully, the tips and tricks tutorial will be useful today.
Source/VIA : XDA


